Französische Apfeltarte
Französische Apfeltarte vegan
Knuspriger Boden, saftige Äpfel – ein einfaches Herbstrezept, das immer gelingt.

Vegane Apfeltarte Rezept
Zutaten
Boden:
250 g Mehl · 65 g Zucker · 1 Prise Salz · 125 g vegane Butter · 4 EL kaltes Wasser
Füllung:
2 kg Äpfel · 50 g und 1 EL brauner Zucker · 1 EL vegane Butter · 2 EL Aprikosenmarmelade
Zubereitung
-
Mürbteig: Mehl, Zucker und Salz mischen. Margarine in Stücken zugeben und zwischen den Fingern verreiben, bis die Masse krümelig ist. Wasser hinzufügen und rasch zu einem Teig verarbeiten. 45- 60 Minuten kühl stellen. Den Teig ausrollen, in die Form legen und einen Rand formen. Wenn er dabei reißt – kein Problem! Einfach in der Form sanft zusammendrücken. Die Form mit dem Teig nochmals 10 – 20 Minuten kühl stellen.
-
Backen: Ofen auf 200 °C vorheizen. Teig mit einer Gabel am Boden ein paarmal einstechen. Dann 15 Minuten vorbacken.
-
Apfelkompott: Zwei Drittel der Äpfel schälen, entkernen, grob würfeln und mit 50 g Zucker und 2 EL Wasser in einem geschlossenen Kochtopf 20–25 Minuten weich kochen. Dabei ein paarmal umrühren.
-
Belag: Die restlichen Äpfel schälen, halbieren, entkernen und in feine Scheiben schneiden. Das Apfelkompott auf dem Boden verstreichen, die Apfelscheiben fächerförmig darauflegen. Etwas Margarine schmelzen und die Äpfel sowie den Rand damit bepinseln. Mit 1 EL Zucker bestreuen und bei 210 °C 20–25 Minuten goldbraun backen.
-
Finish: Die Marmelade mit 1 EL heißem Wasser glattrühren und die Tarte direkt nach dem Backen damit bestreichen. Lauwarm oder kalt genießen.
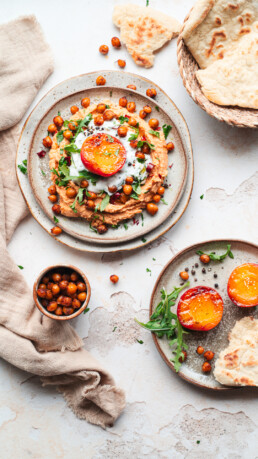
Aprikosen-Hummus mit Fladenbrot
Aprikosen-Hummus mit Fladenbrot, vegan
(english below)
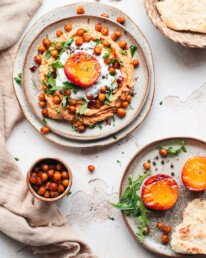
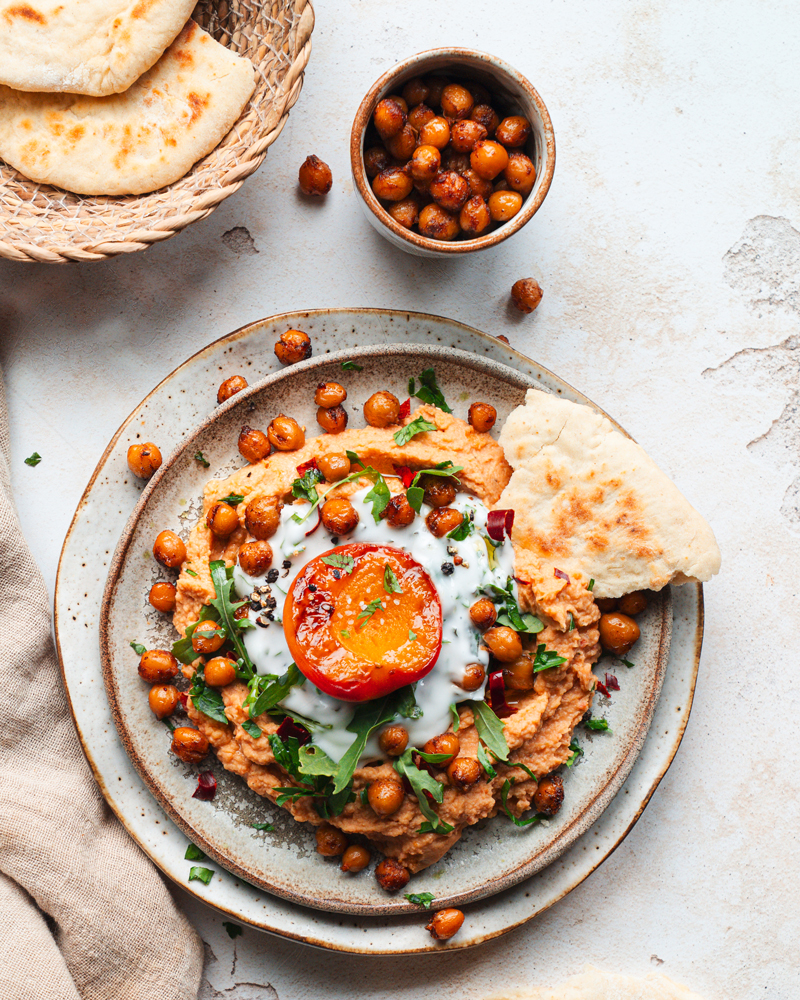
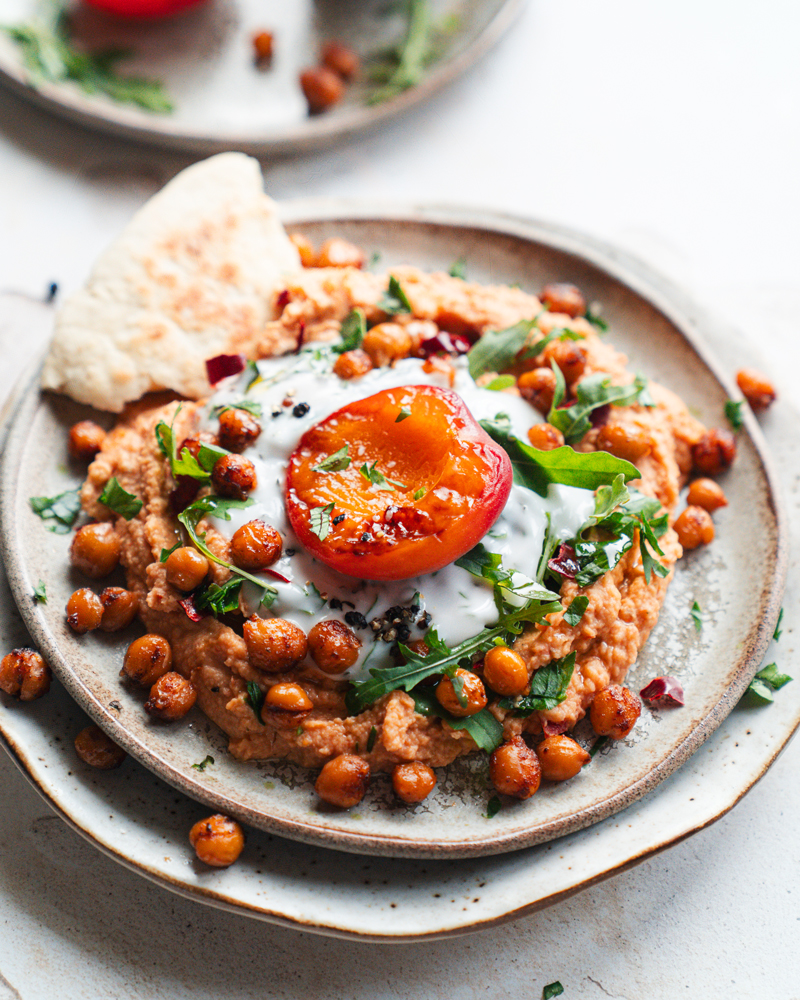
Aprikosen-Hummus
Menge: ca. 2–3 Portionen als Dip oder 1 Schale für Bowl/Teller
Zutaten
-
1 Dose Kichererbsen (ca. 240 g Abtropfgewicht)
-
5 – 6 getrocknete Aprikosen (weich oder 10 Min. in heißem Wasser eingeweicht)
-
1 EL Tahin
-
1–2 TL Zitronensaft (je nach Geschmack)
-
1 TL Zitronenabrieb
-
1/2 kleine Knoblauchzehe (optional leicht geröstet für milderen Geschmack)
-
2–3 EL kaltes Wasser (je nach gewünschter Konsistenz)
-
1–2 EL Olivenöl
-
Salz nach Geschmack
-
Optional: Mit etwas pflanzlichem Joghurt, gerösteten/gerillten Aprikosenhälften, frisch geriebenem Zitronenabrieb, etwas Olivenöl, oder ein paar Kräutern (Petersilie, Rosmarin), oder gehackten Pistazien toppen
Zubereitung
-
Aprikosen vorbereiten: Falls nicht weich, kurz in heißem Wasser einweichen und abtropfen lassen.
-
Alle Zutaten in einen Mixer oder Food Processor geben.
-
Pürieren, bis der Hummus cremig ist. Bei Bedarf Wasser oder etwas mehr Öl hinzufügen.
-
Abschmecken mit Salz, Zitrone und ggf. einem Hauch Ahornsirup
Sweet & Spicy Kichererbsen aus der Pfanne
Zutaten (für 1 Dose Kichererbsen / ca. 240 g Abtropfgewicht):
-
1 Dose Kichererbsen (abgetropft & gut abgetrocknet)
-
1–2 EL Olivenöl
-
1 EL Ahornsirup (alternativ: Agavendicksaft)
-
½ TL geräuchertes Paprikapulver (oder normales)
-
½ TL Kreuzkümmel (gemahlen)
-
¼ TL Cayennepfeffer oder Chiliflocken (nach Schärfewunsch)
-
½ TL Salz
-
Optional: etwas Zitronensaft oder Zesten für Frische
Zubereitung:
-
Kichererbsen vorbereiten
Gut abtropfen lassen und mit Küchenpapier möglichst trocken tupfen. (Je trockener, desto knuspriger werden sie.) -
In der Pfanne rösten
Öl in einer großen Pfanne erhitzen. Kichererbsen bei mittlerer Hitze ca. 10–15 Minuten rundum goldbraun und knusprig braten. Gelegentlich schwenken. -
Würzen
Hitze auf niedrig stellen. Gewürze (Paprika, Kreuzkümmel, Cayenne, Salz) hinzufügen und kurz mitrösten (ca. 30 Sekunden), bis sie duften. -
Süße hinzufügen
Ahornsirup darübergeben und gut vermengen. Noch 1–2 Minuten karamellisieren lassen, dabei ständig rühren, damit nichts anbrennt. -
Abkühlen lassen (optional)
Auf einem Teller ausbreiten und leicht abkühlen lassen – dann werden sie noch knuspriger. Alternativ direkt warm servieren!
Tipp:
-
Perfekt als Crunch-Topping auf Hummus, Salat oder Bowls.
-
Wer mag, gibt kurz vor Schluss noch ein paar Tropfen Zitronensaft oder Limettenzesten dazu – für den Frischekick.
Fladenbrot ohne Hefe – Schnell & Einfach
Zutaten (für 4 kleine Fladenbrote):
-
250 g Weizenmehl (Typ 405 oder 550)
-
150 g pflanzlicher Joghurt)
-
1 TL Backpulver
-
½ TL Salz
-
1 EL Olivenöl
-
Optional: etwas Wasser, falls der Teig zu trocken ist
Zubereitung:
-
Teig zubereiten
Mehl, Backpulver und Salz in eine Schüssel geben. Joghurt und Olivenöl hinzufügen. Alles zu einem weichen, glatten Teig verkneten. Falls der Teig zu fest ist, 1–2 EL Wasser einarbeiten. -
Teig ruhen lassen
Teig ca. 10 Minuten abgedeckt ruhen lassen (nicht zwingend, aber hilft der Konsistenz). -
Brote formen
In 4 Portionen teilen, auf bemehlter Fläche zu dünnen Fladen (ca. ½–1 cm dick) ausrollen oder flach drücken. -
Backen in der Pfanne
Eine beschichtete oder gusseiserne Pfanne stark erhitzen. Fladen ohne Öl einzeln 2–3 Minuten pro Seite backen, bis sie Blasen werfen und leicht gebräunt sind.

Apricot Hummus
Servings: makes about 1 medium bowl (enough for 2–3 portions as a dip or topping)
Ingredients
-
1 can chickpeas (about 240 g drained)
-
5–6 dried apricots (soft, or soaked in hot water for 10 minutes)
-
1 tbsp tahini
-
1–2 tsp lemon juice (to taste)
-
1 tsp lemon zest
-
1/2 small garlic clove (optional: roasted for a milder flavor)
-
1 tsp fresh rosemary, finely chopped (or ½ tsp dried)
-
2–3 tbsp cold water (adjust for desired texture)
-
1–2 tbsp olive oil
-
Salt to taste
-
Optional: serve with a spoonful of plant-based yogurt on top, fresh roasted halved apricots, top with olive oil, fresh lemon zest, parsley, a rosemary sprig, or chopped pistachios.
Instructions
-
Soften the apricots (if needed) by soaking them in hot water for 10 minutes. Drain before using.
-
Combine all ingredients in a food processor or high-powered blender.
-
Blend until smooth and creamy. Add more water or olive oil as needed for your preferred consistency.
-
Taste and adjust with more lemon, salt, or sweetener as desired.
Sweet and Spicy Skillet-Roasted Chickpeas
Ingredients (for 1 can / ~240 g drained weight):
-
1 can chickpeas (drained and well dried)
-
1–2 tbsp olive oil
-
1 tbsp maple syrup (or agave syrup)
-
½ tsp smoked paprika (or regular paprika)
-
½ tsp ground cumin
-
¼ tsp cayenne pepper or chili flakes (adjust to taste)
-
½ tsp salt
-
Optional: A splash of lemon juice or some lemon zest for brightness
Instructions:
-
Prep the chickpeas
Drain and pat the chickpeas as dry as possible using a paper towel. (The drier they are, the crispier they’ll get.) -
Pan-roast
Heat the olive oil in a large skillet over medium heat. Add chickpeas and roast for about 10–15 minutes, stirring occasionally, until golden and crispy. -
Add spices
Lower the heat. Add paprika, cumin, cayenne, and salt. Stir for about 30 seconds until fragrant. -
Add sweetness
Pour in the maple syrup and toss well to coat. Let it caramelize for 1–2 minutes, stirring constantly to avoid burning. -
Cool or serve warm
Spread on a plate to cool (they’ll crisp up more) or serve warm right away.
Tip:
-
Great as a crunchy topping for hummus, salads, grain bowls – or simply as a snack.
-
For extra zing, add a few drops of lemon juice or a bit of zest right at the end.
Quick & Easy Flatbread (No Yeast)
Perfect with hummus or dips
Ingredients (makes 4 small flatbreads):
-
250 g all-purpose flour (about 2 cups)
-
150 g plant-based yogurt (about ⅔ cup)
-
1 tsp baking powder
-
½ tsp salt
-
1 tbsp olive oil
-
Optional: a little water if the dough is too dry
Instructions:
-
Make the dough
In a bowl, mix the flour, baking powder, and salt. Add the yogurt and olive oil. Knead until a soft, smooth dough forms. If it’s too dry, add a tablespoon or two of water. -
Rest the dough (optional)
Let the dough rest for 10 minutes (covered). This helps with elasticity but can be skipped if you’re in a hurry. -
Shape the flatbreads
Divide into 4 portions. Roll out or press each one into a flat round, about ½–1 cm thick. -
Cook in a pan
Heat a dry nonstick or cast iron skillet over medium-high heat. Cook each flatbread for about 2–3 minutes per side, until golden and puffed in spots.
Tips:
-
Best served warm with hummus, olive oil, or herbs.
-
Brush with garlic oil or herb butter after cooking for extra flavor.
-
You can replace part of the flour with whole wheat flour if desired (e.g., 50/50 mix).

The Creamiest Coconut Nicecream Base
The Creamiest Coconut Nicecream Base (with fruit of your choice)
(Rezept auf deutsch unten)
Some days just need something frozen, creamy and simple.
This nicecream was made with exactly three thoughts in mind:
→ no stress
→ no refined sugar
→ yes to joy in a bowl

Recipe
Ingredients (serves 1 – 2):
-
1 large banana (chopped, frozen)
-
1 cup frozen fruit of your choice
-
2 tbsp coconut cream or thick canned coconut milk (use the solid part)
-
1 tbsp cashew or almond butter (adds creaminess & depth)
-
Optional: ½ tsp vanilla, 1 tsp maple syrup (if extra sweetness is needed)
Instructions:
-
Add the frozen banana, frozen fruit, coconut cream, and nut butter to a high-speed blender or food processor.
-
Let sit for 2–3 minutes to slightly soften, then blend or pulse until smooth and creamy — don’t overblend, to keep it cold.
-
If needed, add 1 – 2 tsp plant milk to help the blades move, but use sparingly.
-
Serve immediately as soft-serve, or transfer to a container and freeze for 4 hours for a firmer, scoopable texture.
Cremige Kokos-Nicecream Rezept (mit gefrorenen Früchten nach Wahl)
Vegan • Sommerlich • Super cremig
Zutaten für 1 – 2 Portionen:
-
1 große Banane (kleingeschnitten, gefroren)
-
1 Tasse gefrorene Früchte nach Wahl
-
2 EL Kokoscreme oder sehr cremige Kokosmilch (aus der Dose, der feste Teil)
-
1 EL Cashew- oder Mandelmus (macht’s besonders cremig & rund)
-
Optional: ½ TL Vanille, 1 TL Ahornsirup (bei Bedarf)
- I topped it with a drizzle of coconut blossom syrup
Zubereitung:
-
Gefrorene Banane, gefrorene Früchte, Kokoscreme und Nussmus in einen starken Mixer oder Food Processor geben.
-
Kurz antauen lassen (2 – 3 Minuten), dann kräftig mixen oder pulsieren – nicht zu lange, damit die Masse kalt und cremig bleibt.
-
Nur bei Bedarf 1 – 2 TL Pflanzenmilch zugeben, falls der Mixer stockt.
-
Sofort servieren oder für ca. 4 Stunden tiefkühlen, falls du Kugeln formen möchtest.
Toppings (nach Geschmack):
-
Frische oder leicht angetaute Früchte
-
Kokoschips, gepuffter Amaranth, Sesam
-
Nussmus-Drizzle (z. B. Pistaziencreme, Erdnussbutter)
-
Zitronenmelisse, Minze, essbare Blüten
-
ich habe als Topping etwas Kokosblüten-Sirup verwendet
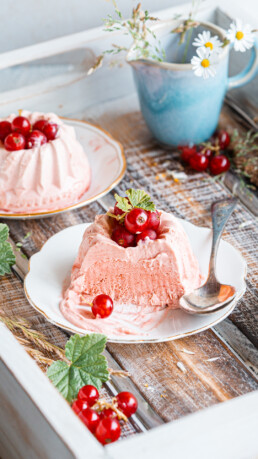
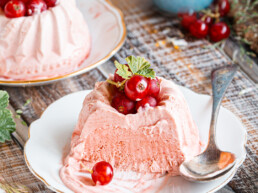
Johannisbeer-Eis-Parfaits
Vegane Johannisbeer-Eis-Parfaits
Vegane Johannisbeer-Eis-Parfaits
Für dieses Rezept benötigt ihr kleine Silikon-Gugelhupfformen (ca. 7 cm Durchmesser)
Zutaten (ergibt ca. 8 Stück):
– 300 g gefrorene rote Johannisbeeren, aufgetaut und durch ein Sieb gestrichen
– 75 g Puderzucker
– 75 g Puder-Kokosblütenzucker (gekauft oder selbst gemahlen)
– 2–3 EL veganer Vanillepudding (gekauft oder selbst gekocht)
– 225 ml vegane Sahne zum aufschlagen
– 1 Prise Meersalz
– Optional: 1 TL Zitronensaft
🧊 Zubereitung:
- Beeren vollständig auftauen und mit Hilfe eines Löffels durch ein feines Sieb streichen.
- Zitronensaft verrühren.
- Puderzucker, Kokosblütenzucker und Vanillepudding einrühren.
- Vegane Sahne steif schlagen, Meersalz zugeben und vorsichtig unterheben.
- In ca. 7 cm große Gugelhupf-Silikonformen füllen und für mind. 4 Stunden einfrieren.
- Vor dem Servieren ca. 5 Minuten antauen lassen, aus der Form drücken und genießen.
🌿 Kokosblütenzucker bringt eine milde Karamellnote – ohne die Frucht zu überdecken.
💡 Perfekt zum Vorbereiten und ideal als leichter Sommernachtisch!


Lately I’ve been craving simple pleasures – like frozen fruit, soft silence and pretty little things that melt too fast. These red currant ice parfaits came out of that mood: delicate, sweet-tart, and shaped like tiny edible summer crowns.
I used my favorite mini bundt molds (7 cm, silicone – they’re magic!) and somehow it made the whole thing feel a bit more special. It’s the kind of dessert you serve quietly, maybe on the balcony, maybe just for yourself. Because pretty food isn’t always about impressing anyone… sometimes it’s just for the soul.
Anyway, if you love red currants, creamy textures, and the sound of a spoon tapping porcelain – this one’s for you. 🤍
Vegan Red Currant Parfaits
For this recipe, you’ll need small silicone Bundt-style molds (approx. 7 cm diameter).
Ingredients (makes ~ 8)
– 300 g frozen red currants, thawed and strained (or fresh berries)
– 75 g powdered sugar
– 75 g coconut sugar
– 3 tbsp vegan vanilla pudding (store-bought or homemade)
– 250 ml vegan whipping cream
– 1 pinch sea salt
– 1 tsp lemon juice
- Press berries through a fine sieve using a spoon to remove seeds.
- Stir in lemon juice.
- Add powdered sugars and vanilla pudding – mix until smooth.
- Whip vegan cream until fluffy, add sea salt, and fold gently into the berry mix.
- Pour into silicone molds and freeze for at least 4 hours.
- Let sit 5 mins at room temp before unmolding – enjoy cold!

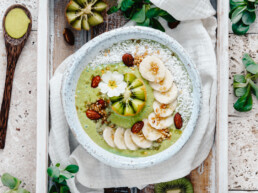
Kiwi, Apple & Greens Smoothie Bowl
Kiwi, Apple & Greens Smoothie Bowl
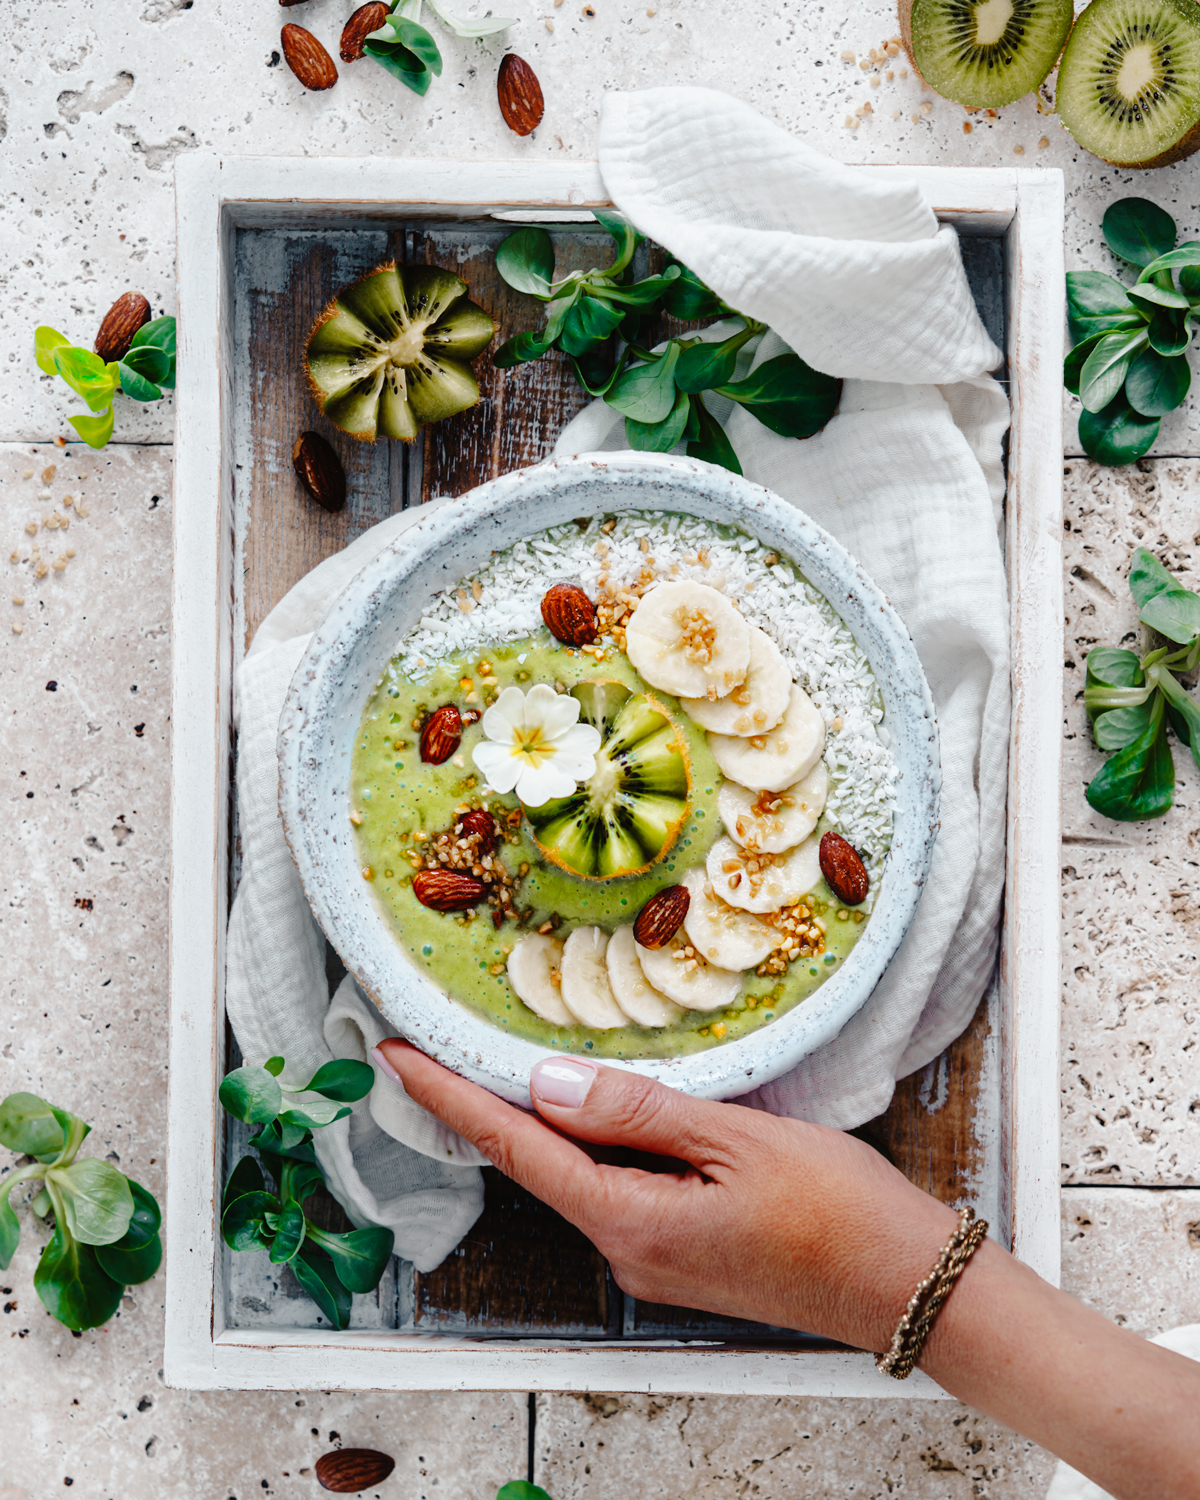
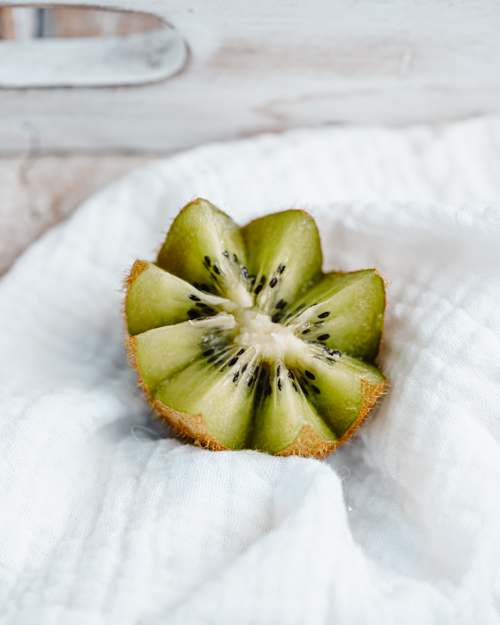
Kiwi, Apple & Greens Smoothie Bowl
Zutaten (für 2 Portionen)
Für die Bowl:
- 1 Handvoll Feldsalat (gewaschen)
- 2 reife Kiwis (geschält)
- 1 reife Banane (am besten gefroren)
- 4 EL Kokosjoghurt
- 1 kleiner Apfel
- Ein paar Spritzer Limettensaft
- 1 EL Chiasamen
- Optional: etwas Wasser oder pflanzliche Milch (für die Konsistenz)
Topping:
- Frische Kiwischeiben
- Bananenscheiben
- Granola oder gehackte Nüsse
- Kokosflocken
- Hanfsamen
Zubereitung
- Alle Zutaten für die Bowl in einen Mixer geben.
- Auf hoher Stufe mixen, bis eine glatte, cremige Masse entsteht. Je nach gewünschter Konsistenz etwas Flüssigkeit hinzufügen.
- In eine Schüssel füllen.
- Mit den Toppings kreativ anrichten – das Auge isst mit!
- Genießen 🌿
English
Kiwi, Apple & Greens Smoothie Bowl
Ingredients (serves 2)
For the bowl:
- 1 handfuls of lamb’s lettuce
- 2 ripe kiwis (peeled)
- 1 ripe banana (preferably frozen)
- 4 tbsp coconut yogurt
- 1 small apple
- A squeeze of lime juice
- 1 tbsp chia seeds
- Optional: a splash of water or plant-based milk (to adjust consistency)
Toppings:
- Fresh kiwi slices
- Banana slices
- Granola or chopped nuts
- Coconut flakes
- Hemp seeds
Instructions
- Place all bowl ingredients in a blender.
- Blend on high until smooth and creamy. Add a splash of liquid if needed for blending.
- Pour into a bowl.
- Add your favorite toppings – get creative!
- Enjoy mindfully 🌿

Vegane Karottentorte
Vegane Karottentorte
(English Recipe below)
Mit Frischkäse-Butter-Frosting.


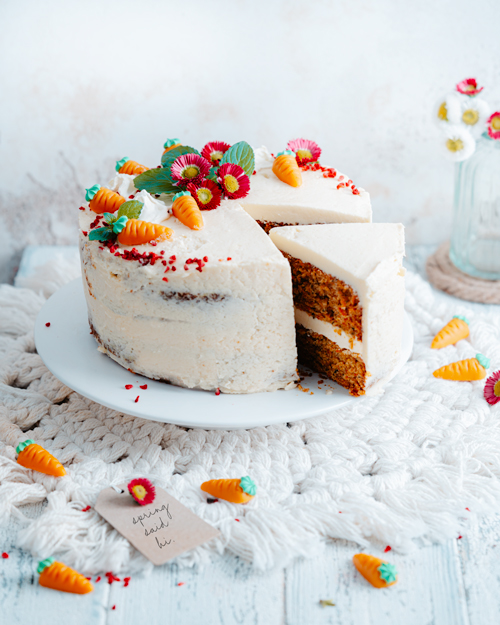
💡 Tipp aus eigener Erfahrung:
Ich habe den Kuchen mit gemahlenen Kürbiskernen statt Nüssen gebacken – perfekt für alle mit Nussallergie in der Familie. Geschmacklich top und die Konsistenz bleibt wunderbar!
Vegane Karottentorte mit Frischkäse-Butter-Frosting
Zutaten
Zutaten – Teig (für 2 Springformen à 24 cm):
- 320 g Mehl (z. B. Dinkel oder Weizen)
- 100 g gemahlene Mandeln oder Walnüsse (bei Nussallergie gemahlene Kürbiskerne)
- 50 g Speisestärke
- 2½ TL Backpulver
- 1 TL Natron
- 1 Prise Salz
- 150 g brauner Zucker
- 100 g weißer Zucker
- 350 g Karotten, fein geraspelt
- 220 ml Pflanzenmilch (z. B. Hafer oder Soja)
- 120 ml neutrales Öl (z. B. Rapsöl)
- 1 TL Apfelessig oder Zitronensaft
- 1 TL Vanilleextrakt
Zutaten – Veganes Frischkäse-Butter-Frosting:
- 250 g vegane Butter (zimmerwarm, aber nicht zu weich)
- 200 g veganer Frischkäse (z. B. Oatly, Violife)
- 125 g Puderzucker
- 2 EL Speisestärke (für Standfestigkeit)
- 1 TL Vanilleextrakt
- 1 TL Zitronensaft
Zubereitung
1. Teig
- Den Ofen auf 180 °C Ober-/Unterhitze vorheizen. Zwei Springformen (24 cm) einfetten oder mit Backpapier auslegen.
- Die Karotten fein raspeln.
- Mehl, Nüsse, Speisestärke, Backpulver, Natron, Salz und Zucker in einer großen Schüssel vermengen.
- Pflanzenmilch, Öl, Essig und Vanille verrühren und zu den trockenen Zutaten geben.
- Die geraspelten Karotten unterheben, nur so lange rühren, bis alles vermischt ist.
- Den Teig gleichmäßig auf beide Formen verteilen und ca. 35–40 Minuten backen. Mit Stäbchenprobe prüfen.
- Böden vollständig auskühlen lassen.
2. Frosting:
- Die vegane Butter cremig aufschlagen (2–3 Minuten).
- Frischkäse, Vanille und Zitronensaft zugeben, kurz unterrühren.
- Puderzucker und Speisestärke einarbeiten, zunächst mit einem Löffel, dann kurz aufschlagen.
- Für mehr Festigkeit das Frosting ca. 15–30 Minuten kalt stellen.
3. Torte zusammensetzen
- Einen Boden auf eine Tortenplatte legen und etwa ein Drittel des Frostings darauf verteilen.
- Den zweiten Boden aufsetzen und leicht andrücken.
- Die Torte dünn rundherum mit Frosting einstreichen (Crumb Coat), kühlen.
- Danach die restliche Creme auf der Torte und an den Seiten glatt oder rustikal verstreichen.
- Gekühlt servieren. Hält sich im Kühlschrank 2–3 Tage.
4. Deko-Ideen
- Gehackte Walnüsse
- Marzipankarotten
- Essbare Blüten
- frische Minze
- gehackte gefriergetrocknete Himbeeren
English
Vegan Carrot Layer Cake with Cream Cheese-Butter Frosting
Ingredients
Ingredients – Cake (for 2 x 22-24 cm / 9.5″ cake pans):
- 320 g all-purpose or spelt flour
- 100 g ground almonds or walnuts (or ground pumpkin seeds for nut allergies)
- 50 g cornstarch
- 2½ tsp baking powder
- 1 tsp baking soda
- 1 pinch of salt
- 150 g brown sugar
- 100 g white sugar
- 350 g finely grated carrots
- 220 ml plant milk (e.g. oat, soy, or almond)
- 120 ml neutral oil (e.g. canola or sunflower)
- 1 tsp apple cider vinegar or lemon juice
- 1 tsp vanilla extract
Ingredients – Vegan Cream Cheese Butter Frosting:
- 250 g vegan butter (room temp)
- 200 g vegan cream cheese (e.g. Oatly, Violife, or similar)
- 125 g powdered sugar
- 2 tbsp cornstarch (for stability)
- 1 tsp vanilla extract
- 1 tsp lemon juice
Instructions
1. Cake:
- Preheat the oven to 180 °C / 350 °F (top/bottom heat). Grease and line two 24 cm / 9.5″ cake pans.
- Finely grate the carrots.
- In a large bowl, whisk together flour, ground nuts or seeds, cornstarch, baking powder, baking soda, salt, and both sugars.
- In a separate bowl or jug, mix plant milk, oil, vinegar, and vanilla.
- Combine wet and dry ingredients, then gently fold in the grated carrots. Don’t overmix.
- Divide the batter evenly between the pans and bake for approx. 35–40 minutes, or until a toothpick comes out clean.
- Let the cakes cool completely before frosting.
2. Frosting
- eat the vegan butter until light and creamy (about 2–3 minutes).
- Add vegan cream cheese, vanilla, and lemon juice. Mix briefly to combine.
- Gradually add powdered sugar and cornstarch. Stir in first, then briefly beat again.
- Chill for 15–30 minutes to firm up, if needed.
3. Assembling the Cake
- Place the first cake layer on a plate or turntable. Spread about one-third of the frosting on top.
- Gently place the second layer on top and press down slightly.
- Apply a thin layer of frosting around the sides and top (a “crumb coat”), then chill briefly.
- Finish frosting the entire cake with the remaining cream – smooth or rustic, your choice.
- Store in the fridge. Keeps well for 2–3 days.
4. Decoration Ideas
- Chopped walnuts
- Marzipan carrots
- edible flowers
- fresh mint leaves

Oreo Cheesecake
Oreo Cheesecake
(English Recipe below)
Ein veganer Cheesecake muss nicht immer roh oder no-bake sein – dieser gebackene Oreo-Cheesecake beweist das Gegenteil! Die Kombination aus knusprigem Keksboden, cremiger Füllung und frischen Erdbeeren ist nicht nur ein echter Hingucker, sondern schmeckt auch unglaublich gut.

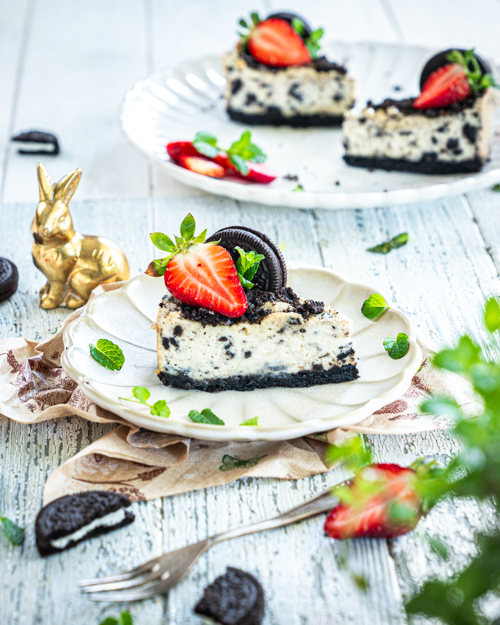
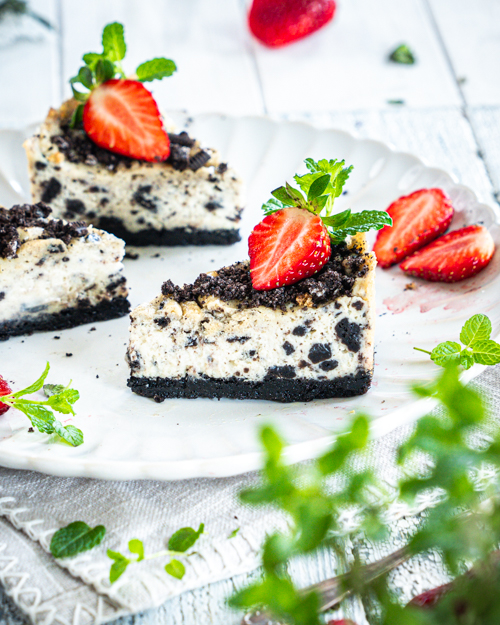
Weil der Kuchen gebacken wird, hat er eine wunderbar feste Konsistenz, bleibt aber dank veganem Joghurt und Frischkäse herrlich saftig. Und das Beste: Er kommt ganz ohne tierische Produkte aus, ist aber trotzdem ein voller Genuss – auch für Nicht-Veganer.
Egal ob zu Ostern, zum Frühlingsbrunch oder einfach als Sonntagskuchen – dieser vegane Oreo-Cheesecake passt einfach immer. Und weil er sich super vorbereiten lässt, eignet er sich auch perfekt für Gäste oder zum Mitbringen.
Gebackener Veganer Oreo-Cheesecake mit Erdbeeren
Zutaten
Boden:
- 200 g Oreo-Kekse (Original, vegan)
- 50 g geschmolzene vegane Margarine / Butter oder Kokosöl
Füllung:
- 600 g veganer Frischkäse
- 150 g pflanzlicher Joghurt (z. B. Hafer, Soja oder Mandel)
- 50 g geschmolzene vegane Margarine / Butter oder Kokosöl
- 100 g Puderzucker
- 2 TL Vanilleextrakt
- 1 EL Zitronensaft
- 2 EL Speisestärke
- 6 – 8 Oreo-Kekse, grob zerkrümelt
Topping:
- Gehackte Oreos und ein paar ganze zur Deko
- Frische Erdbeeren
- Optional: frische Minze
Zubereitung
1. Boden vorbereiten:
- Oreos samt Füllung fein zerbröseln.
- Mit geschmolzener Margarine/Kokosöl mischen.
- In eine mit Backpapier ausgelegte Springform (20 cm) drücken.
- Bei 170 °C (Ober-/Unterhitze) 10 Minuten vorbacken, dann herausnehmen.
2. Füllung zubereiten:
- Frischkäse, pflanzlichen Joghurt, geschmolzene Margarine/Kokosöl, Puderzucker, Vanille, Zitronensaft, Speisestärke gut verrühren.
- Zerkrümelte Oreos unterheben.
- Die Creme auf den Boden geben und glattstreichen.
3. Backen:
- Bei 160 °C (Ober-/Unterhitze) ca. 45 Minuten backen.
- Wichtig: Der Cheesecake darf in der Mitte noch „wackeln“ – das ist normal!
- Danach im ausgeschalteten Ofen mit leicht geöffneter Tür 15 Minuten ruhen lassen, dann vollständig abkühlen.
4. Kühlen & Dekorieren:
- Mindestens 4 Stunden (oder über Nacht) im Kühlschrank fest werden lassen.
- Die Oberfläche kann nach dem Backen etwas uneben oder fleckig sein – kein Problem! Einfach mit gehackten und ganzen Oreos sowie frischen Erdbeeren belegen, und er wird richtig schön aussehen.
English
Baked Vegan Oreo Cheesecake with Strawberries
Ingredients
Crust:
- 200 g Oreo cookies (original, vegan)
- 50 g melted vegan butter or coconut oil
Filling:
- 600 g vegan cream cheese
- 150 g plant-based yogurt (e.g. oat, soy or almond)
- 100 g powdered sugar
- 50 g melted vegan butter or coconut oil
- 2 tsp vanilla extract
- 1 tbsp lemon juice
- 2 tbsp cornstarch
- 6 – 8 Oreos, roughly crumbled
Topping:
- Chopped and whole Oreos for decoration
- Fresh strawberries
- Optional: fresh mint leaves
Instructions
1. Prepare the crust:
- Finely crush the Oreos (with the filling).
- Mix with melted vegan butter or coconut oil.
- Press into a lined 20 cm springform pan.
- Prebake at 170 °C (top/bottom heat) for 10 minutes, then remove from oven.
2. Make the filling
- Mix vegan cream cheese, yogurt, sugar, melted vegan butter/coconut oil, vanilla, lemon juice, and cornstarch until smooth.
- Fold in the crumbled Oreos.
- Pour the filling onto the crust and smooth it out.
3. Bake
- Bake at 160 °C (top/bottom heat) for approx. 45 minutes.
- Don’t worry if the center still jiggles – that’s totally normal!
- Turn off the oven, leave the door slightly open, and let the cake rest inside for 15 minutes. Then remove and let it cool completely.
4. Chill & Decorate
- Let set in the refrigerator for at least 4 hours (preferably overnight).
- The surface might look a bit uneven after baking – totally fine! Just top with chopped and whole Oreos and fresh strawberries and it will look beautiful!

Vegan Biscoff Cheesecake / Spekulatius Cheesecake
Vegan Biscoff Cheesecake
english / deutsch
This Biscoff cheesecake is the one. 🎄✨Spiced cookie crust, fluffy cream filling, and that creamy Biscoff drizzle on top—it’s everything I love about holiday desserts. To make it even more special, I added a little touch of green: strawberry leaves from my garden. They’re still holding on, even though the cold is creeping in.
Recipe
Perfect for 6–8 small cake rings or an 18 cm springform pan.
Ingredients:
Crust:
- 175 g Biscoff biscuits, vegan (crumbled)
- 50 g butter, vegan (melted)
- Pinch of salt
Filling:
- 600 g vegan cream cheese (e.g., coconut- or soy-based)
- 200 ml vegan whipped cream (whipped)
- 100 g powdered sugar
- 1 tsp vanilla extract
- 1 tsp agar-agar + 50 ml water
Topping:
- 200 g Biscoff spread, vegan
Optional: cookie crumbs or cinnamon for decoration
Instructions
Crust:
Mix biscuit crumbs with melted butter and a pinch of salt. Press the mixture into the base of small cake rings or a springform pan. Chill for 15 minutes.
Prepare Agar-Agar:
Mix the agar-agar with 50 ml of water, bring it to a boil, and let it simmer gently for 1–2 minutes. Remove from heat and let it cool slightly, but only briefly.
Make the Filling:
Pour the filling onto the crust and smooth the top. Place the cheesecake for 30 minutes in the refrigerator.
Lightly warm the Biscoff spread until it becomes pourable, then drizzle it over the cheesecakes. Chill the cake for at least 4–6 hours (preferably overnight) to set.
Topping:
Decorate as desired.

Veganer Spekulatius Cheesecake
Rezept
Für 6–8 kleine Tortenringe oder eine Springform (18 cm)
Zutaten:
Boden:
- 175 g Spekulatius, vegan (fein zerbröselt)
- 50 g Butter, vegan (geschmolzen)
- 1 Prise Salz
Füllung:
- 600 g veganer Frischkäse (z. B. auf Kokos- oder Sojabasis)
- 200 ml vegane Schlagsahne (aufgeschlagen)
- 100 g Puderzucker
- 1 TL Vanilleextrakt
- 1 TL Agar-Agar + 50 ml Wasser
Topping:
- 200 g Biscoff-Creme, vegan
Optional: zerbröselte Kekse, oder Zimt für die Dekoration
Zubereitung
Boden:
Die Spekulatiuskrümel mit geschmolzener Butter und einer Prise Salz vermischen. Die Masse in kleine Tortenringe oder den Boden einer Springform drücken und für 15 Minuten in den Kühlschrank stellen.
Agar-Agar vorbereiten:
Agar-Agar mit 50 ml Wasser verrühren, aufkochen und 1–2 Minuten leicht köcheln lassen. Vom Herd nehmen und nur kurz etwas abkühlen lassen.
Füllung herstellen:
Den veganen Frischkäse, Puderzucker und Vanilleextrakt glatt rühren. Das Agar-Agar zügig unterrühren. Anschließend die aufgeschlagene Schlagsahne vorsichtig unterheben.
Füllen:
Die Füllung auf den Boden geben und glatt streichen. Kuchen für 30 Minuten in den Kühlschrank stellen.
Die Biscoff-Creme leicht erwärmen, bis sie flüssig ist, und über den Cheesecakes gießen. Kuchen für mindestens 4–6 Stunden (am besten über Nacht) im Kühlschrank fest werden lassen.
Nach Belieben dekorieren.

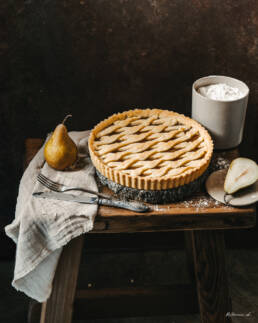
Birnen Pie
deutsch / english
Veganer Birnen Pie
Rezept
Zutaten:
- Für den Boden:
- 150 g vegane Butter (Zimmertemperatur, weich)
- 5–6 EL Wasser
- 50 g Zucker
- 300 g Mehl
- Für die Füllung:
- 4–5 Birnen
- 1–2 EL Speisestärke
- 125 g brauner Zucker
- 1 TL Zimt (optional)
Zubereitung
Teig vorbereiten:
Zucker, vegane Butter und Wasser in einer Schüssel schaumig schlagen. Nach und nach das Mehl hinzufügen und zu einer Kugel kneten, dabei nur kurz kneten, bis sich der Teig gerade so verbindet. Den Teig für 30 Minuten im Kühlschrank ruhen lassen.
Teig in die Form geben:
Etwa zwei Drittel des Teigs auf einer bemehlten Arbeitsfläche in der Größe der Pie-Form ausrollen. Den Teig in die Form legen und mit den Fingern einen Rand formen. Falls der Teig beim Übertragen in die Form einreißt, kann er einfach mit den Fingern ausgebessert und zusammengedrückt werden. Die Form mit dem Teig anschließend in den Kühlschrank stellen.
Füllung zubereiten:
Birnen schälen, entkernen und in Würfel schneiden. Die Würfel zusammen mit dem braunen Zucker (und optional Zimt) in eine Pfanne geben und vorsichtig einige Minuten weich garen. 1 EL Stärke hinzufügen und die Masse zu einem Mus pürieren. Sollte das Mus noch zu wässrig sein, einen weiteren Esslöffel Stärke einrühren.
Pie zusammenstellen:
Das Birnenmus gleichmäßig auf den vorbereiteten Teig in der Form geben. Den restlichen Teig erneut ausrollen und in lange Streifen schneiden. Die Streifen auf der Birnenfüllung gitterförmig anordnen.
Backen:
Den Pie im vorgeheizten Ofen bei 180°C etwa 35 Minuten backen. Nach dem Backen aus dem Ofen nehmen und in der Form abkühlen lassen.


The scent of pears and cinnamon fills the air as the light slowly fades. A simple pear pie, baked for the pure joy of autumn. Nothing rushed, nothing extra – just the warmth of the season, held together in a tender, golden crust. 🍂
Vegan Pear Pie Recipe
Ingredients:
- For the Crust:
- 150 g vegan butter (room temperature, softened)
- 5–6 tbsp water
- 50 g sugar
- 300 g flour
For the Filling:
- 4–5 pears
- 1–2 tbsp cornstarch
- 125 g brown sugar
- 1 tsp cinnamon (optional)
Instructions
Prepare the Dough:
In a bowl, cream together the sugar, vegan butter, and water. Gradually add the flour and knead just until it comes together into a ball (avoid over-kneading). Let the dough chill in the refrigerator for 30 minutes.
Roll Out and Line the Pan:
Take about two-thirds of the dough and roll it out on a floured surface to the size of your pie pan. Carefully transfer the dough into the pan, pressing gently with your fingers to form an even edge. If the dough tears while transferring, simply press it back together with your fingers. Place the lined pan in the refrigerator to chill.
Prepare the Filling:
Peel, core, and dice the pears. Place the pear pieces with the brown sugar (and cinnamon, if using) in a pan, and cook gently for a few minutes until softened. Add 1 tbsp of cornstarch and blend the mixture into a puree. If the mixture seems too watery, stir in an additional tablespoon of cornstarch.
Assemble the Pie:
Pour the pear filling evenly into the prepared crust. Roll out the remaining dough and cut it into long strips. Arrange the strips in a lattice pattern over the filling.
Bake:
Preheat the oven to 180°C (350°F) and bake the pie for about 35 minutes. Remove from the oven and let it cool in the pan before serving.
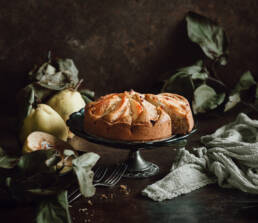
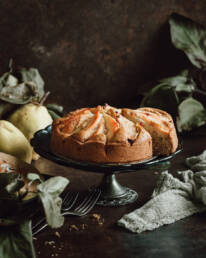
Quince Cake / Quittenkuchen
Vegan Quince Cake
english / deutsch
This quince cake might be easy, but it brings all the cozy autumn vibes. Not your everyday fruit, but that’s why I love it! 💛🍂
Recipe
Ingredients:
for the dough:
- 300 g flour
- 2 tsp baking powder
- 100 ml rapeseed oil
- 125 g sugar
- 3 flaxseed eggs (3 tbsp ground flaxseed + 9 tbsp water)
- A pinch of salt
- 150 ml plant-based milk
for the quince topping:
- 3 quinces
- 1 organic lemon
- 1 tbsp oil
- 1 tbsp sugar
- 1 tsp cinnamon (optional)
Instructions
Dough:
- Prepare the flaxseed egg substitute: Mix the ground flaxseeds with water and let it sit for 10 minutes to thicken.
- In a bowl, combine the flour, baking powder, and salt.
- In a separate bowl, mix the oil, sugar, and plant-based milk. Then add the flaxseed egg mixture.
- Add the flour mixture to the wet ingredients and mix until you get a smooth batter.
- Preheat the oven to 180°C (350°F), using top and bottom heat.
Quinces:
- Peel the quinces, quarter them, remove the cores, and cut them into thick slices.
- Wash the lemon, grate the zest, and squeeze out the juice.
- Heat the oil in a pan. Add the quince slices, lemon juice, sugar, and optional cinnamon. Sauté everything for about 5 minutes over medium heat.
Finishing the cake:
- Pour the dough into a greased springform pan (about 26 cm in diameter).
- Distribute the sautéed quince slices on top of the batter, pressing them in lightly.
- Bake the cake in the preheated oven for about 45 minutes, until golden brown and the quinces are tender. Use a toothpick to check if the cake is done (it should come out clean).
Veganer Quittenkuchen
Dieser Quittenkuchen ist vielleicht simpel, aber er bringt all die gemütlichen Herbststimmungen mit sich. Quitten sind nicht unbedingt alltäglich – genau deshalb mag ich sie so sehr! 💛🍂
Rezept
Zutaten
Für den Teig:
- 300 g Mehl
- 2 TL Backpulver
- 100 ml Rapsöl
- 125 g Zucker
- 3 Leinsameneier (3 EL geschrotete Leinsamen + 9 EL Wasser)
- 1 Prise Salz
- 150 ml Pflanzenmilch
Für die Quitten:
- 3 Quitten
- 1 Bio-Zitrone
- 1 EL Öl
- 1 EL Zucker
- 1 TL Zimt (optional)
Zubereitung
Teig:
- Leinsamen-Eiersatz vorbereiten: Leinsamen mit Wasser mischen und 10 Minuten quellen lassen.
- Mehl, Backpulver und Salz in einer Schüssel gut vermengen.
- In einer separaten Schüssel das Öl, den Zucker und die Pflanzenmilch gut verrühren. Den gequollenen Leinsamen-Eiersatz hinzufügen.
- Die Mehlmischung zu den flüssigen Zutaten geben und alles zu einem glatten Teig verrühren.
- Den Ofen auf 180°C (Ober-/Unterhitze) vorheizen.
Quitten:
- Quitten waschen, schälen, vierteln, entkernen und in breite Spalten schneiden.
- Die Zitrone heiß abwaschen, die Schale fein abreiben und den Saft auspressen.
- Das Öl in einer Pfanne erhitzen. Quitten, Zitronensaft, Zucker und optional Zimt hinzugeben. Alles zusammen etwa 5 Minuten bei mittlerer Hitze anbraten.
Fertigstellen:
- Den Teig in eine gefettete Springform (ca. 26 cm Durchmesser) geben.
- Die angebratenen Quitten auf dem Teig verteilen und leicht eindrücken.
- Den Kuchen im vorgeheizten Ofen etwa 45 Minuten backen, bis er goldbraun ist und die Quitten weich sind. Mit einem Holzstäbchen testen, ob der Teig durchgebacken ist (das Stäbchen sollte sauber herauskommen).
- Den Kuchen abkühlen lassen und genießen.